How to Create and Manage Services in Merlua
How to Create and Manage Services in Merlua
Add treatments to your salon's service menu, set pricing and duration, configure booking requirements, and manage how your services appear to clients.
Build your salon's service menu
Services are the individual treatments your salon offers, such as manicures, lash extensions, brow treatments, and hair styling.
In Merlua, every service has a category, duration, price, and optional settings that determine how it can be booked. You can update these details whenever your salon's offerings change.
Create a category first
Important: Merlua requires every service to belong to an existing category. Create at least one category before adding your first service.
Need help? See How to Create and Manage Service Categories in Merlua.
Start creating a service
Open the Services page
From your Merlua dashboard, navigate to Services.
This page displays your existing services, including their prices, durations, and status. You can also search, filter, edit, or remove services here.
Click + Add Service to create a new treatment.

Open Services and select Add Service to begin creating a treatment.
Enter the service information
The Details tab contains the essential information that identifies your service, along with optional extras.
Enter the service name
The Add Service form opens on the Details tab.
Enter the treatment name in Service Name. Use a clear name clients will recognize, such as "Gel Manicure" or "Brow Wax".
The service name is required.
Select the service category
Open the required Category dropdown and select the category that best matches the treatment.
For example, assign a Gel Manicure to the Nails category.
A service cannot be created without a category.
Add an optional service image
Under Service image, select Add Photo if you want to include a treatment image.
Merlua accepts PNG or JPG images up to 1 MB. A wide cover photo is recommended.
The image is optional, so you can continue without one.
Add extras and service information
Configure optional details
Under Addons (Optional), select any existing add-ons that customers can choose alongside this treatment.
Choose a Consent Form (Optional) when the service requires additional customer consent. Otherwise, leave None — no consent required.
You can also complete Description (Optional) to explain what the service includes.
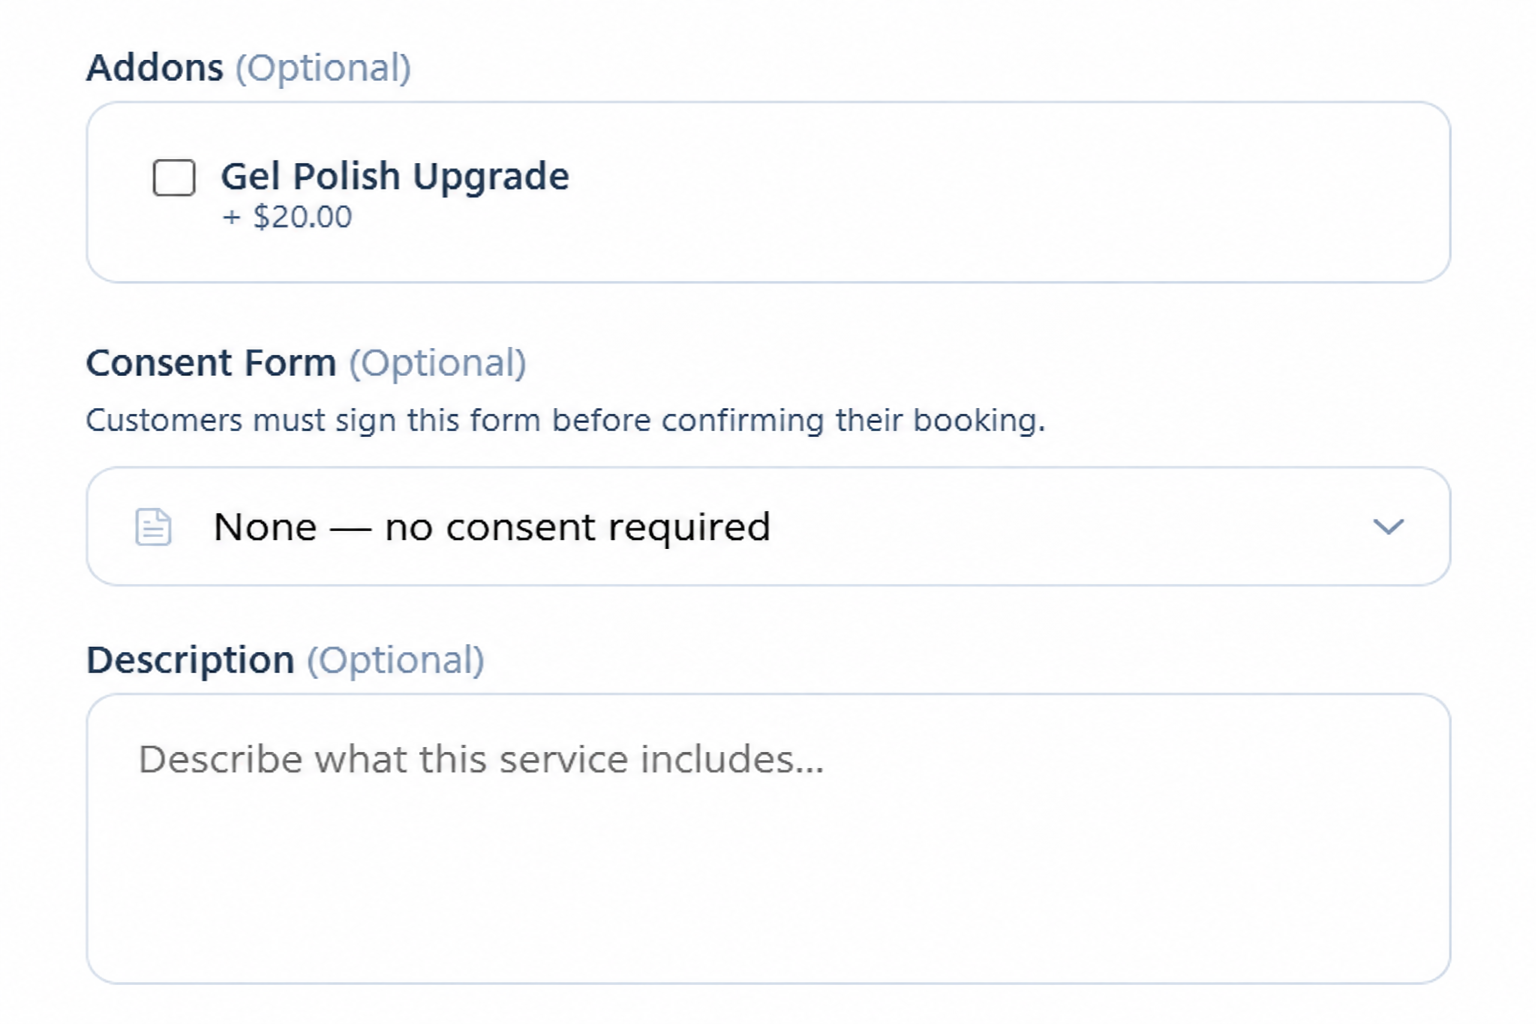 Connect existing add-ons and consent forms
without leaving the service editor.
Configure how the service is scheduled and priced
Set duration and base price
Open the Duration & Pricing tab.
Enter the treatment length using Service Duration and set the standard amount under Base Price ($).
Ensure both values accurately represent the treatment.
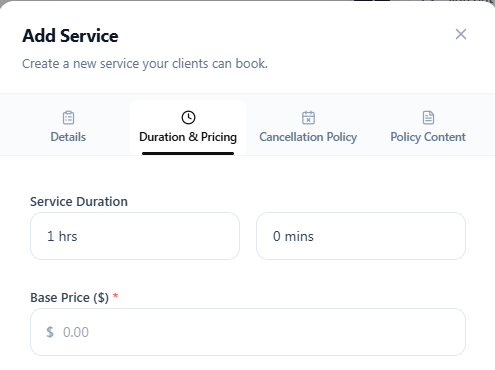 Enter the service duration and standard price.
Add buffer time when needed
Under Buffer Time (mins), use Before and After to add preparation or cleanup time around the appointment.
For example, a 60-minute treatment with 10 minutes before and 10 minutes after requires 80 minutes in the schedule.

Set a required deposit
Enable Deposit Required if customers must pay a deposit to confirm this service.
Choose between Percentage (%) and Fixed ($), then enter the deposit value.
For example, a 20% deposit on a $100 treatment is $20.

Select a percentage or fixed deposit amount.
Configure cancellation and no-show rules
Merlua allows services to follow the salon's general cancellation policy or use service-specific rules.
Choose the policy type
Open Cancellation Policy and choose one of the following:
General policy — Use the salon's existing policy.
Custom policy — Set separate cancellation rules for this service.
No policy — Do not apply the configured cancellation/no-show fee policy to this service.

Looking to configure your salon's general cancellation policy? General salon policies are managed under Settings → Appointment Rules. Learn how to set up your salon's cancellation policy →
Set the cancellation window and fees
When using a custom policy, configure the Free cancellation window. This determines how much notice clients must provide to avoid a late-cancellation fee.
Next, configure the Late cancellation fee and No-show fee. Each can use:
No fee, Fixed amount, Percentage, or Full price.
The 24-hour deadline and 10% fees shown in the example screenshots are sample settings, not universal Merlua defaults.


Review the charge method
Under Charge method, review the available fee collection options.
Manual review allows an authorized user to review an eligible fee before collection.
Automatic, when enabled and properly configured, can initiate the permitted fee after an authorized late-cancellation or no-show action.
Automatic collection requires the applicable Stripe setup and customer payment authorization.

Important: Selecting Manual review or Automatic does not authorize charges to a saved card. The customer must have accepted the applicable appointment policy and provided valid fee authorization. Deposits retained toward an applicable fee reduce the balance owed by default, and previously collected fee payments must also be accounted for.
Add service-specific policy wording
Enter additional policy information
Open the Policy Content tab and locate Custom content for service policy.
Add any additional wording specific to the treatment. This content is displayed during customer checkout when provided.
Leave it blank if no extra information is necessary.
Make sure this wording does not contradict the configured cancellation deadlines or fees.

Control whether clients can see the service
Review public visibility
Locate Availability and review Available to Public.
When enabled, the service can appear on your public booking page.
When disabled, the service is hidden from public service selection.
Review the Consent Form Required indicator, which reflects the consent form selected in the Details tab.

Save, edit, and manage services
Save your new service
Review all required settings, then select Save Service.
The service will appear in your Services list.
Edit or remove an existing service
Return to Services and locate the treatment.
Use Edit to change its settings, then select Update Service.
The delete icon is also available for service management. Review linked appointments before attempting removal.
Assign the service to team members
After creating a service, navigate to Team Members and open an eligible staff member.
Configure the services that team member can perform and save the assignment.
Remember: Service-to-staff assignments are managed in Team Members, not inside the Add Service form. The assigned staff member must also have suitable availability for the appointment.

Assign treatments to eligible staff in Team Members.
Before clients start booking
Common questions
Can I create a service without a category?
No. Every service must be assigned to an existing category.
Can different services have different deposits?
Yes. You can configure a fixed or percentage-based deposit for individual services.
Can a service have its own cancellation policy?
Yes. Choose Custom policy to configure service-specific cancellation and no-show rules.
Where do I assign services to staff?
Open Team Members and configure each eligible team member's service assignments.
Can I hide a service without deleting it?
Yes. Disable Available to Public to hide it from the public booking page.
Your service is ready for booking
With the service configured, its booking requirements reviewed, and eligible team members assigned, clients can find suitable appointment times through your public booking page when the service is made available.
Keep going
Related tutorials
Was this guide helpful?
Tell us — it helps us make these better.